


When we say the coolest DIYS, we mean it, too! Classically beautiful and endlessly customizable, candles are a crafter’s favorite. We’ll show you how to make a scented candle at home — and, it’s easier than you might think, honestly! Our apartment community is happy to break everything down for you. Check out the supplies you’ll need, as well as the method to our madness below!
Materials:
- 1 package of candle-making soy wax
- 1 package of large candle wicks
- 1 bottle of fragrance oil
- Spatula
- 1 heat-proof container
- 1 double boiler
- 1 thermometer
- 1 pair of chopsticks
Instructions:
- Measure out how much wax you would need to fill your container, then double it. Pour the wax into your double boiler and allow it to melt for 10 to 15 minutes, stirring frequently.
- When your candle wax is melted, it’s time to add fragrance oils. Follow the instructions on your wax package for how much to add. Simply pour it into your melted wax and stir for a few seconds.
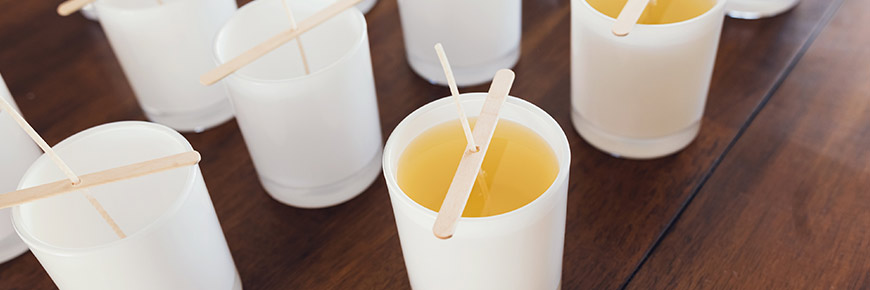
- Attach the wick to the bottom of your container before you pour in the wax. You can attach the wick by dipping it in the melting wax then quickly sticking it to the bottom of the container. Let the wax sit for five minutes to harden. Alternatively, you can superglue it.
- When the temperature on the thermometer reads 140 degrees F, slowly pour the wax into your container. Hold the wick in place, but don’t pull on it. Leave a small amount of wax in the boiler for topping off your candle later.
- Lay two chopsticks across the top of the container. Sandwich the wick in between so that it stays centered while the wax hardens. Allow the wax to set for four hours at room temperature
- Cut the wick. Your candle wick should be less than half an inch long. If, when lit, the candle flickers or has a tall flame, trim the wick.
Oxford at Lake View Apartments in Corinth, Texas